
Taking rose cuttings can be a cost-effective and rewarding way to propagate your favorite rose plants. In this article, we will guide you through the process of taking rose cuttings, ensuring that you have the best chance of growing a healthy new plant.
Choosing the Right Time and Tools
The first step in taking rose cuttings is to select the right time and gather the appropriate tools. The best time to take rose cuttings is during late spring or early summer when the plant is actively growing. It’s crucial to use clean, sharp pruning shears to make precise cuts. You will also need rooting hormone, a small pot, and well-draining soil. Make sure all your tools are sterilized to avoid transmitting any diseases to the cuttings.
Selecting the Best Stem
Choosing the right stem is essential for successful propagation. Look for healthy stems that are about the thickness of a pencil and have at least three to five leaf nodes. The stem should be green and firm, not woody or soft. Make sure it’s free from any diseases or pests, as cuttings from unhealthy plants are less likely to root successfully.
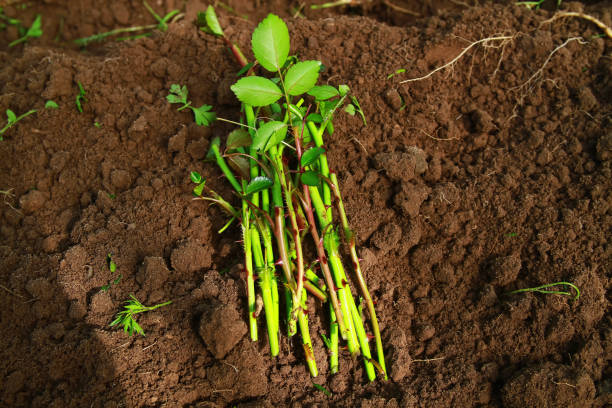
Taking the Cutting
Once you’ve selected the perfect stem, make a cut just below a leaf node at a 45-degree angle. This angle increases the surface area for rooting and helps in better absorption of water and nutrients. The cutting should be about 6 to 8 inches long. Remove the leaves from the bottom half of the cutting, but keep a few leaves at the top to help with photosynthesis.
Preparing the Cutting for Planting
Before planting, dip the cut end of the stem into rooting hormone powder. This step is crucial as it encourages quicker root development. Gently tap off any excess powder. Fill a small pot with well-draining soil, and make a small hole in the center with a pencil or stick. Insert the treated cutting into the hole, and firm the soil around it to eliminate any air pockets.
Planting and Care
After planting, water the soil thoroughly but ensure it remains moist and not waterlogged. Cover the pot with a plastic bag or a clear plastic bottle to create a mini greenhouse effect, which maintains humidity and warmth. Place the pot in a bright, indirect light location. Avoid direct sunlight as it can stress the cutting. Keep the soil moist but not soggy, and mist the cutting occasionally to maintain humidity.
Conclusion
By following these step-by-step guidelines, you can successfully take rose cuttings and propagate your favorite rose varieties. With the right care and conditions, your cuttings will develop roots and grow into healthy new rose plants. Enjoy the process and the beautiful results it brings to your garden.
FAQs
Q1: How long does it take for rose cuttings to root?
A1: Typically, rose cuttings take about 4 to 8 weeks to develop roots, depending on the conditions.
Q2: Can I take rose cuttings in the fall?
A2: Yes, you can take rose cuttings in the fall, but it’s generally less successful than in spring or summer due to lower temperatures and reduced light.
Q3: Do I need to use rooting hormone?
A3: While not absolutely necessary, using rooting hormone significantly increases the success rate of root development in rose cuttings.
Q4: What type of soil is best for rose cuttings?
A4: A well-draining soil mix is best, often a combination of potting soil and perlite or sand works well.
Q5: How can I tell if my rose cutting has rooted?
A5: You can gently tug on the cutting after a few weeks; if you feel resistance, it indicates that roots have started to develop.